Google Forms have evolved a lot over the years. From using pen and forms with checkboxes to developing web pages with multiple answer options for collecting data, especially for small business owners, NGOs, etc, we have come a long way.
As things get better, businesses seek to integrate payments into them. You can now add a PayPal link to a Google form in a few simple steps. Then, ask your clients to click the link after submitting their responses, and funds are transferred to your PayPal account. It’s that easy!
Besides a straightforward integration, adding PayPal to forms lets you track real-time payments, is highly secured, and doesn’t need you to invest in a third-party website, thereby saving costs. You can use PayQ, one of the most reliable platforms for you to add PayPal to your Google Forms.
Methods to Add PayPal to Google Forms
I believe Google Forms are meant to be painless and short. But adding multiple layers of unnecessary interaction doesn’t keep it that way. That said, as customers are redirected to another page, chances are they won’t return to fill out the form. Including a payment link is meant to facilitate conversion rates and not lead your customers away.
Alternatives include using peer-to-peer payment, emailing customers regarding payments, and using an add-on. As far as my experience goes, adding PayPal using the Google marketplace add-on is the best possible alternative. Here’s how to do it.
Add PayPal Using the Google Marketplace Add-on
Amongst others, PayQ is probably one of my favorite add-ons specific to Google Marketplace. Why? It fulfills its primary purpose pretty well, i.e., acts as a bridge between your forms and payment gateways like PayPal, RazorPay, and Stripe.
That’s not the best part. Aside from being a seamless and secure payment solution, it lets you track payments through dedicated Google Sheets. Now let’s explore the detailed steps as to how you can do it:
1. Install the PayQ extension
Step 1: Head on to the Google Workspace Marketplace and search for PayQ to download the extension. Or just click the link.
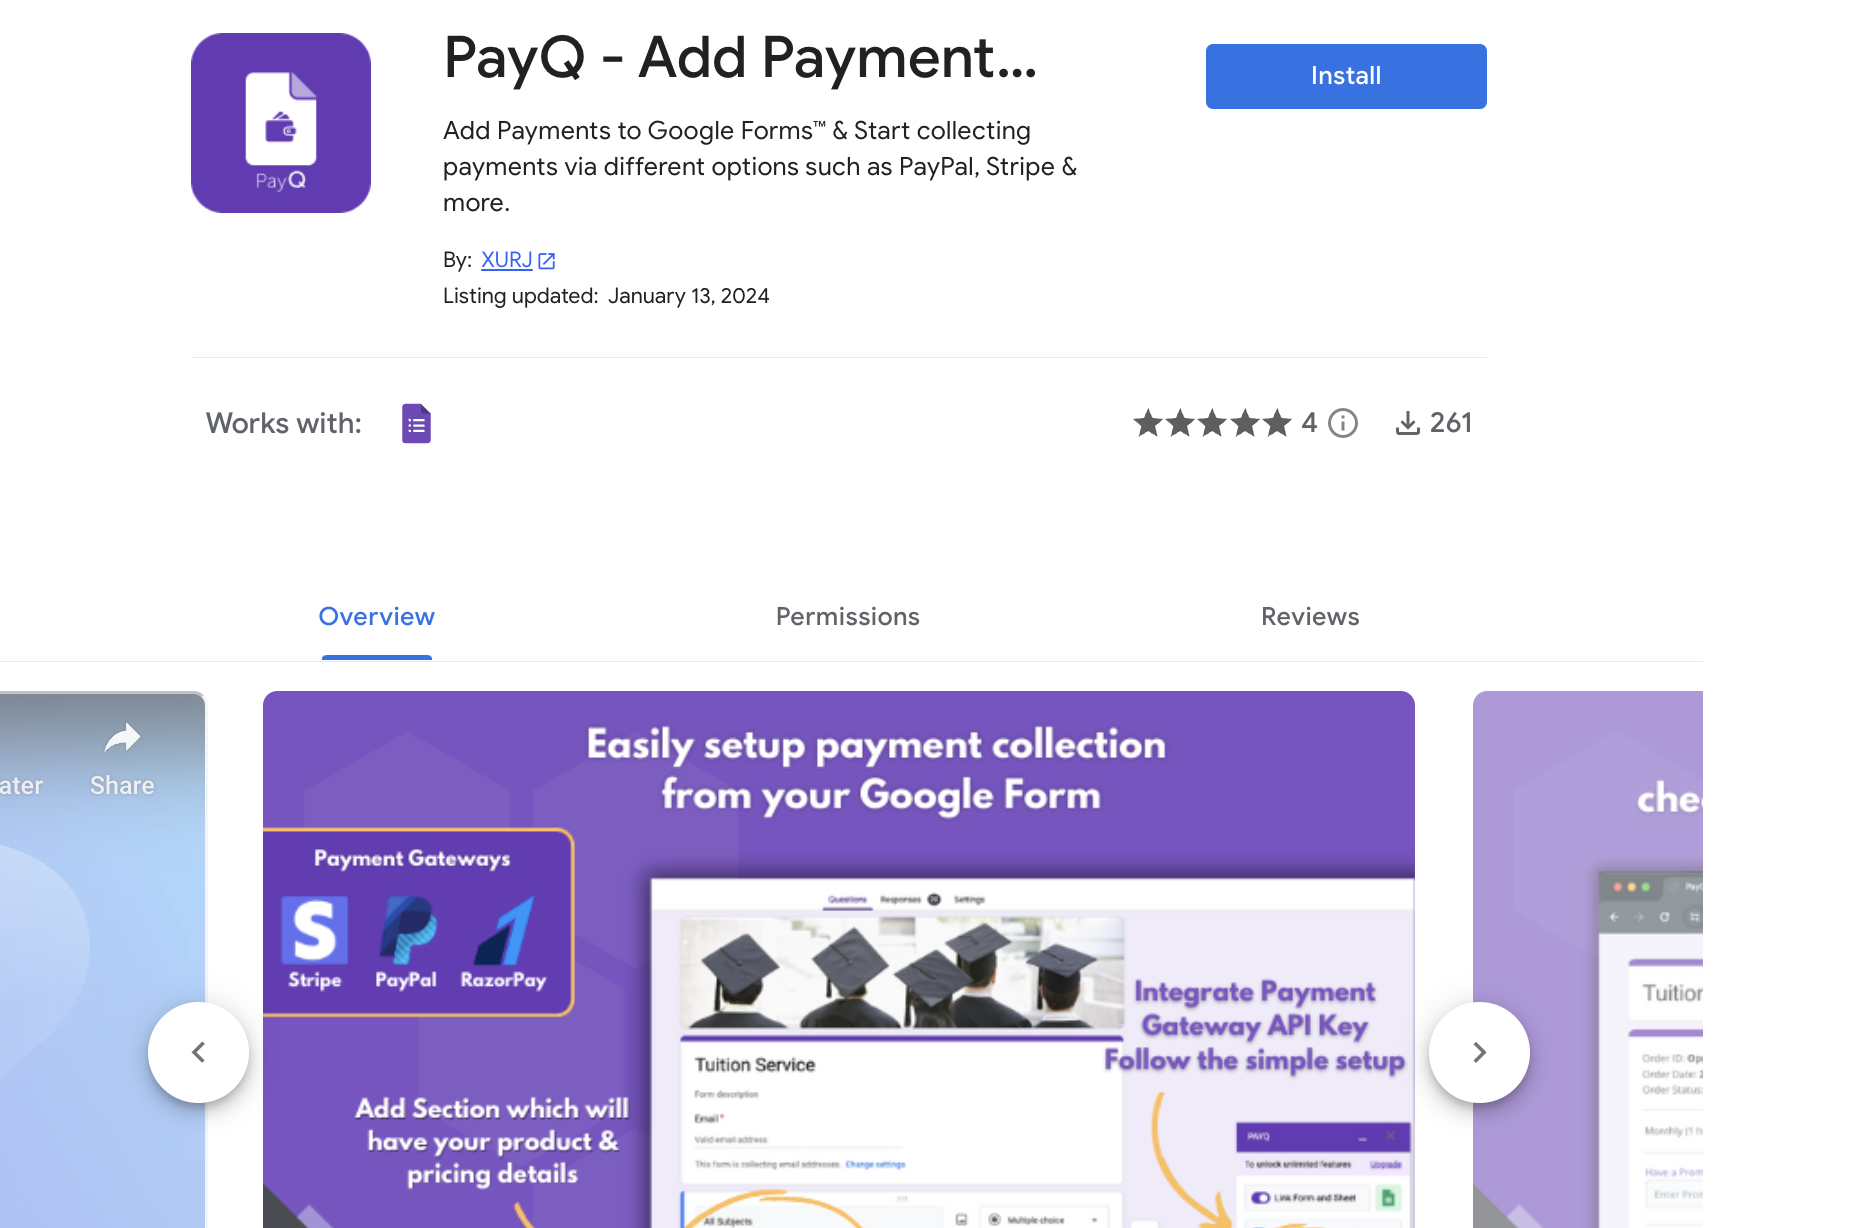
Step 2: As the extension pops up on your screen, click on it and read through the available details.
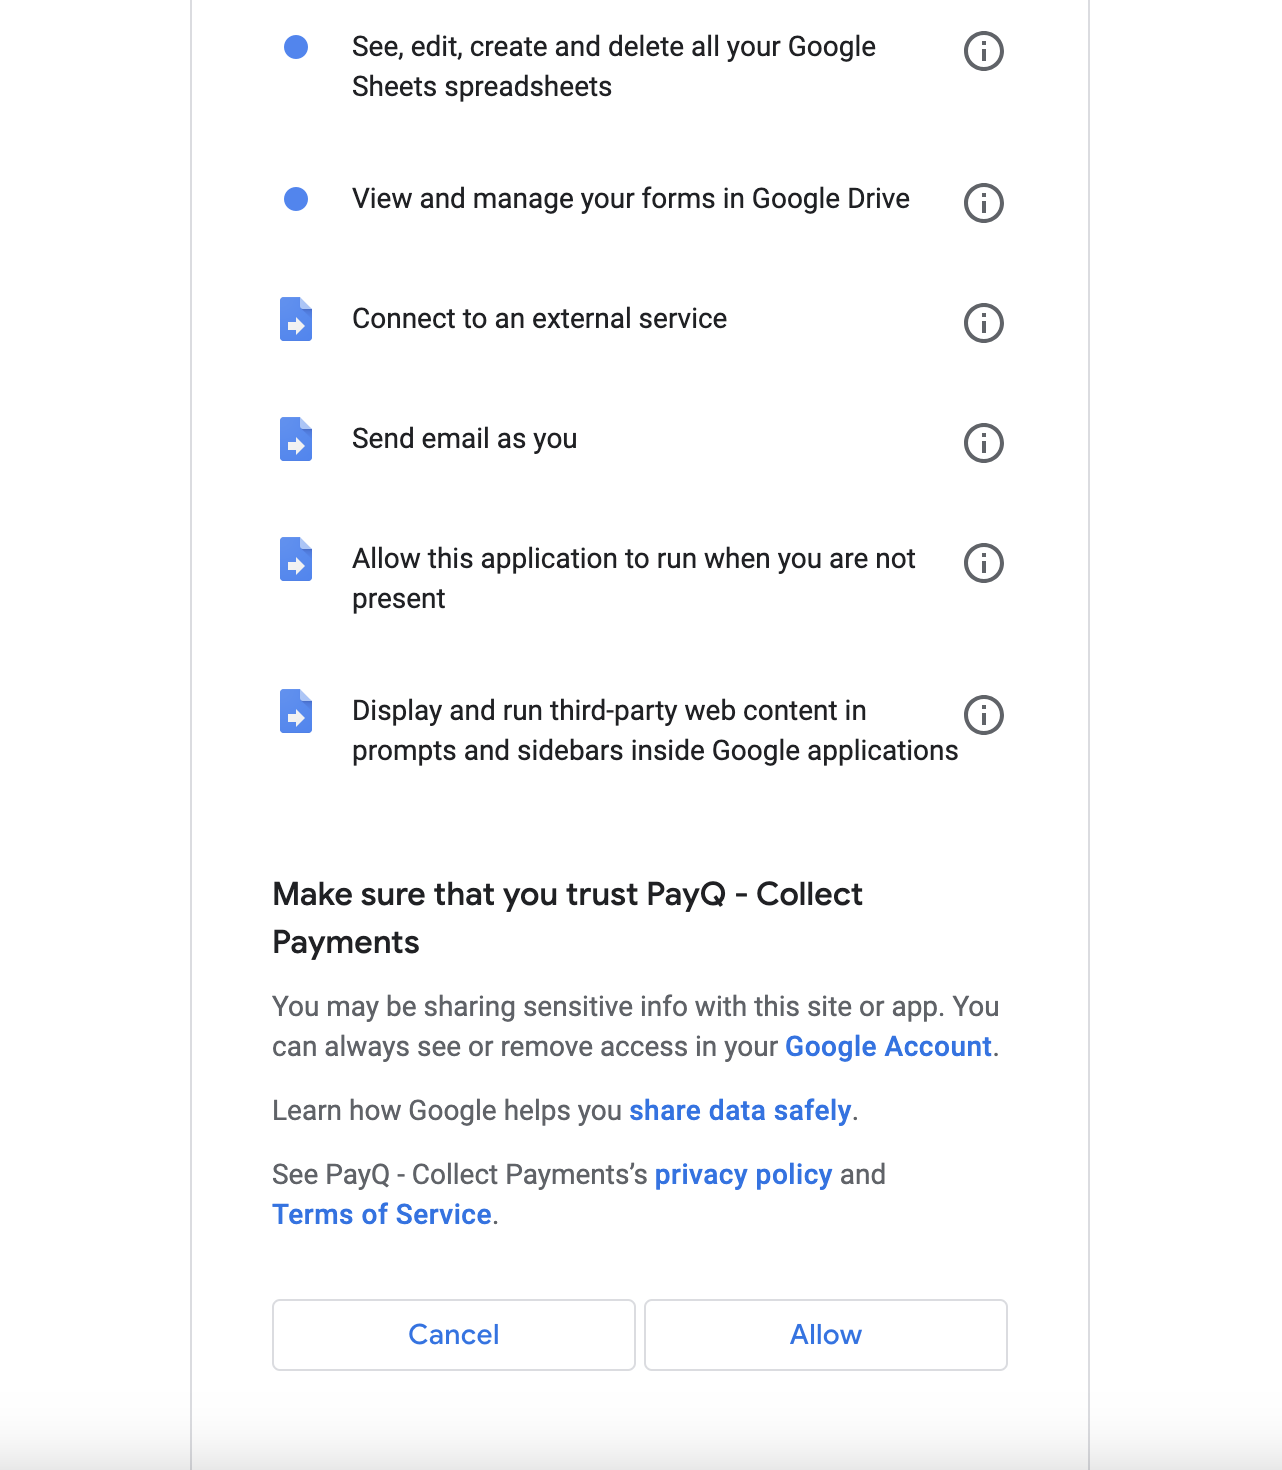
Step 3: Once you feel good to go, hit the Install button, accept the terms and conditions, and that’s it, the download & installation should be complete within a few minutes.
However, getting started with the gateway requires a bit more. Here’s what:
Step 1: Access the Google Forms dashboard and sign in using your email ID.
Step 2: You’ll find a set of pre-existing forms to choose from, or you can create your own. Integrating PayQ is fine, but make sure to structure your form well.
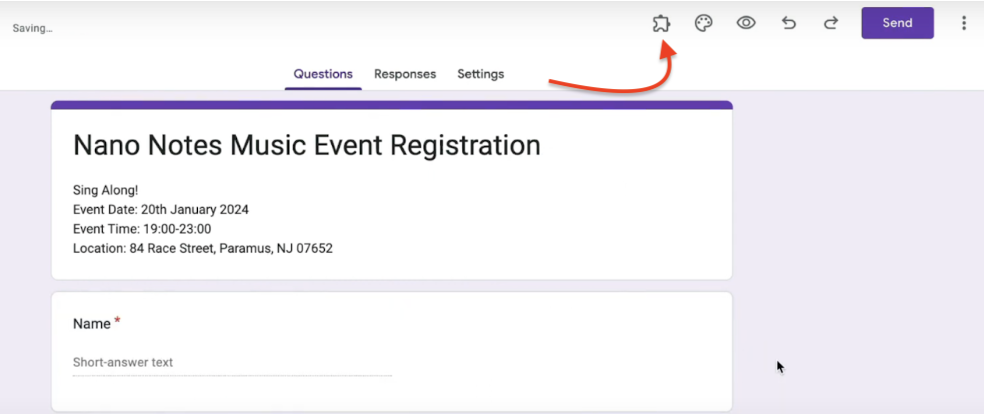
Step 3: As you’re happy with the form, you’ll find the PayQ option in the puzzle icon located up top.
You will see a popup box on the bottom right corner. Head onto it, and hit the first option- Link form and sheet.
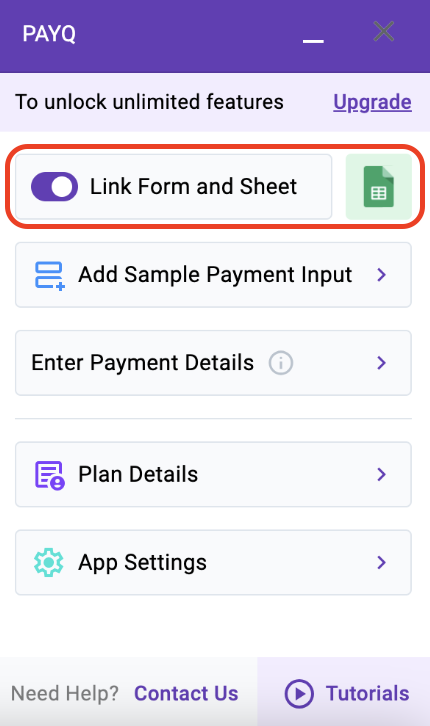
Check out the Sheet to see how the details will be tracked for the form and the payments made.

Then, move on to adding a payment input option and integrating payment partners.
2. Add Payment Input Option
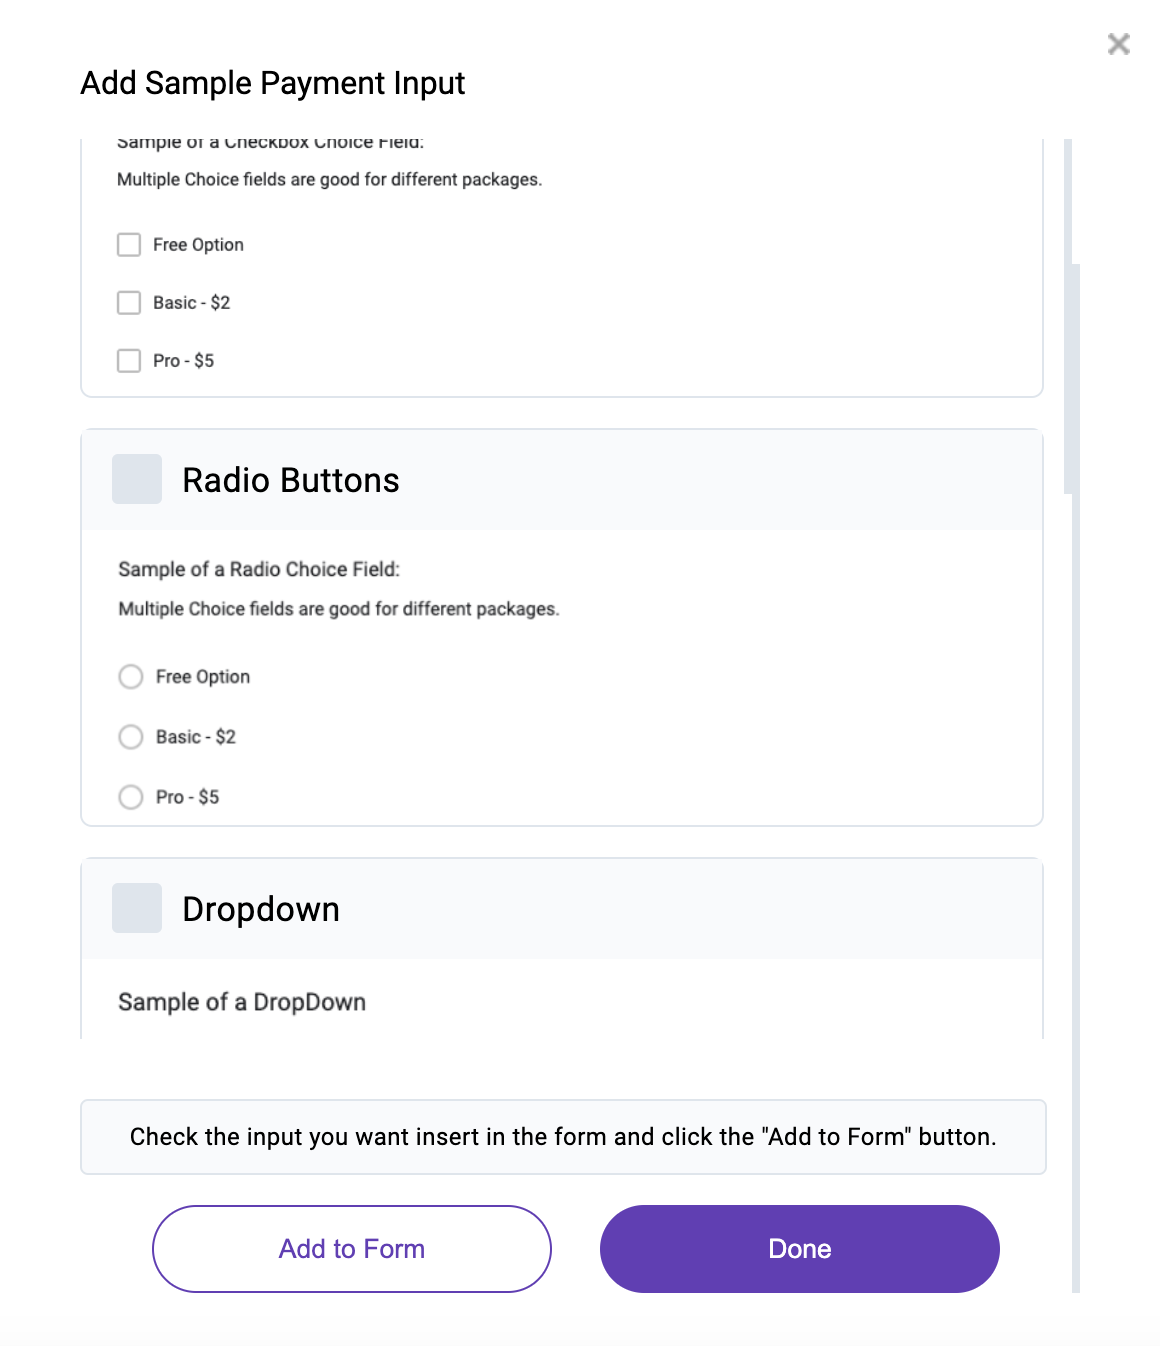
Before you integrate a payment partner into your forms, select the way you want your customers to pay. PayQ provides a customizable option, including radio buttons, checkboxes, checkbox grids, dropdowns, and even short text. Select one and add it to your form.
The option should be based on the nature of your form. For example, you can include radio boxes or checkboxes for a subscription-based service.
- Radio Buttons: Radio buttons let users select one option from a list of available choices. For example, you might ask respondents to choose their preferred payment method from options like PayPal, RazorPay, bank transfer, etc.
- Checkboxes: Unlike radio buttons, checkboxes let users select multiple options from a list of choices. For example, you might ask respondents which products they’re interested in purchasing from the list of available options.
- Dropdowns: Dropdowns, also known as select menus, present a list of options in a dropdown menu, and respondents can select one option. You can ask for payment options with dropdowns as well.
- Checkbox Grids: Checkbox grids are similar to checkboxes, but options are presented in a grid form. This is useful when you have multiple questions with the same set of response options.
- Short Text: Short text lets users input brief text responses and is useful when you want respondents to provide short comments and answers. For example, you might want your customer to provide their experience using your product.
3. Adding PayPal Gateway
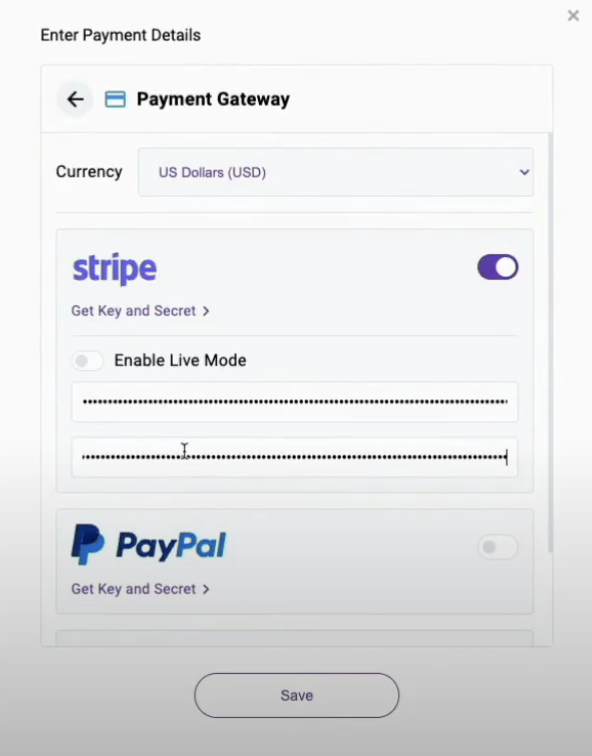
Now, it’s time to integrate PayPal's payment partner with PayQ. On the dashboard, find a section called “Enter payment details,” where you can integrate PayPal with the form data.
Choose the option to obtain payments in your preferred currency.
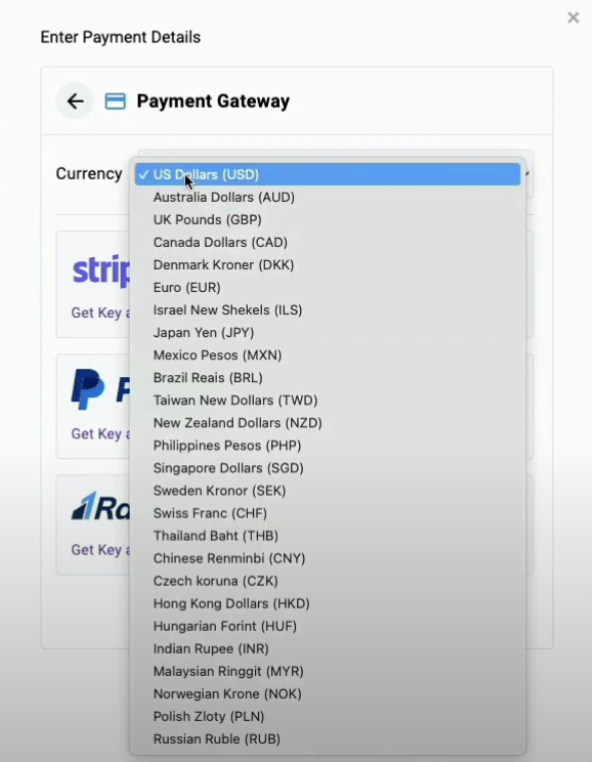
You can also switch the payment gateway (from Paypal to RazorPay) and currency type (from dollar to others) anytime.
As you select PayPal as the payment gateway, head over to its dashboard or your account, followed by the Developer section > Test mode, and pick the API keys.
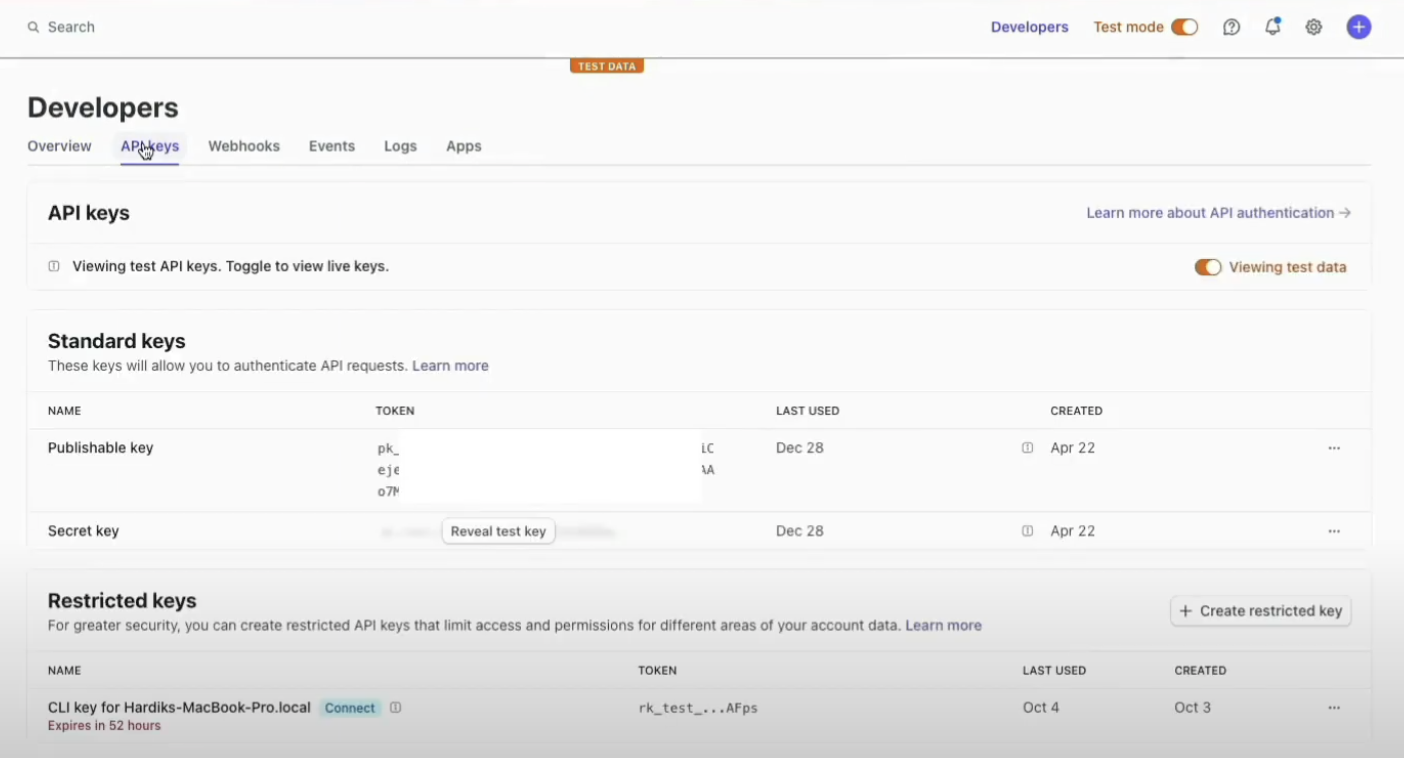
Feed the obtained API keys into the PayQ interface and test the payment.
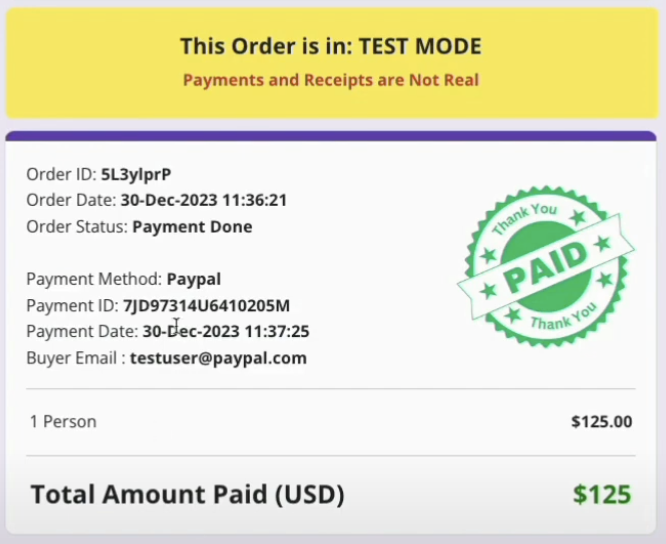
4. Test in “Test Mode”
Before beginning to collect payment via the form, I recommend trying the test mode. The best part about it is it lets you do everything, like add in handling charges, tax, or a promo code, to ensure the add-on is working properly. For that, you must subscribe to a PayQ plan. Once you do, go on to try it by following the steps below:
Step 1: Test a payment by entering the necessary details to check if it generates a sample receipt.
Step 2: Once done, check the notifications users would read out when they successfully complete a payment or order a service.
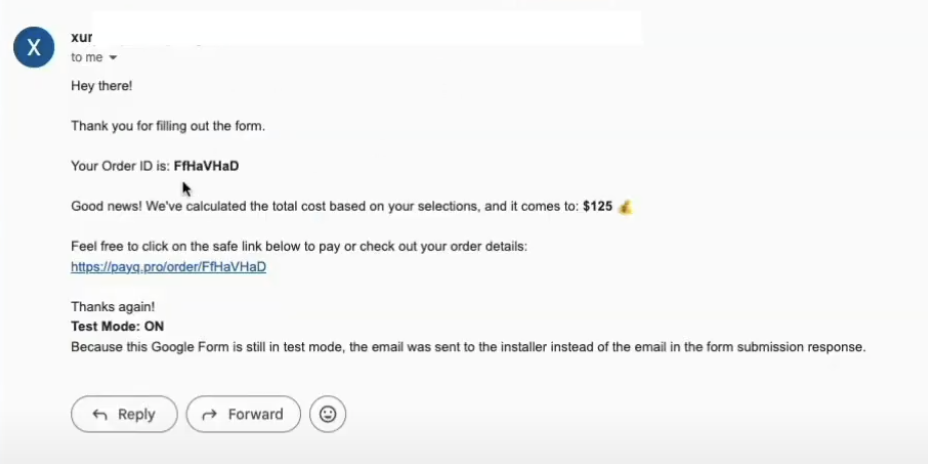
Step 3: If you’re sure everything’s working as anticipated, hit “send” to make a user-specific version of the form.
5. Payment Tracking
If the Test mode generates anticipated results, you’ll need to get a step behind to access PayPal’s dashboard, hit the “live mode,” and set the API keys to receive payments from customers. As your business starts off, follow the steps to track your payments:
Step 1: Open the linked sheet where your customers have made payments.
Step 2: Monitor the PayQ fields as they are updated after every submission.
Step 3: Using the same dashboard, check if the payments are made or not.
What’s great about working with Google Forms is it records each response made, along with the payment credits, including payment ID, method, date, as well as order date.
By now, I hope you can use PayQ add-ons to receive payments directly on Google Forms. And users will get a detailed copy of their responses and a payment acknowledgment mailed to the ID they put in.
Frequently Asked Questions
1. Is the PayQ add-on free?
A: Yes, PayQ add-on is free to download and install. But you must pay a subscription fee to integrate a payment gateway to it.
2. Where do I get the PayPal payment link from?
A: You can get the PayPal payment link from the “Enter payment details” section of the PayQ interface.
Wrap Up!
By now, you’re ready to create your first payable Google form using PayQ. Besides PayPal, there are other payment gateway on offer, like Stripe, RazorPay, and others, but it’s worth mentioning that you should use one gateway at once.
should use one gateway at once. With that comes an end to my information-based guide. Let me know in the comments below if you have any queries or suggestions. Till then, goodbye and take care!